# cafe24의 가상서버(ubuntu20.04)를 구입하여 진행했다.
# anaconda 설치하여 진행
# mac(m1)의 터미널을 이용하여 가상 서버에 접속했다.
[가상 서버 접속]
# mac에서 가상 서버 접속
ssh root@[서버HostName or IP]
ssh root@[서버HostName or IP] -p [Port]
[Anaconda 설치]
# download
# 공식사이트에서 버전과 파일명 확인
# https://www.anaconda.com/download#downloads
wget https://repo.anaconda.com/archive/Anaconda3-2023.03-1-Linux-x86_64.shFree Download | Anaconda
Anaconda's open-source Distribution is the easiest way to perform Python/R data science and machine learning on a single machine.
www.anaconda.com
# start install process
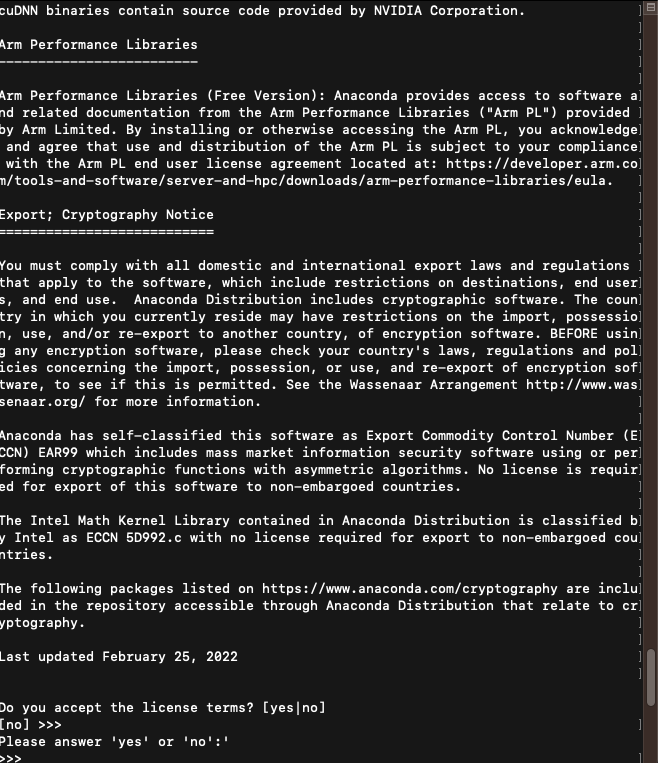
# 아래 코드를 입력하면 약관 내용처럼 보이는 텍스트들이 노출된다.
# 당황하지 말고 엔터를 누르고 있다가 내용이 끝나면 “yes”를 입력하고 한번더 Enter 하면 된다.
sudo bash Anaconda3-2023.03-1-Linux-x86_64.sh


[Anaconda 설정]
# conda init
# 최초 anaconda를 initialize
# conda init은 /home/{user}/.bashrc 에 conda를 초기화 하는 과정을 추가한다.
# 활성화(activate) 코드 입력 시, 설치한 폴더를 참고하여 작성한다.
source /root/anaconda3/bin/activate
conda init
source ~/.bashrc


# Multi-user access
# anaconda를 multi-user가 접근하기 위해 몇가지 사항을 수행한다.
# 추후 anaconda 사용자가 추가될 시, 생성 및 설정한 group에 사용자를 추가해야한다.
# Create group
sudo groupadd {mygroup}

# Change the group ownership to “mygroup”
sudo chgrp -R {mygroup} /root/anaconda3

# Set read and write permission for root and mygroup only
sudo chmod 770 -R /root/anaconda3

# Add users to a group
sudo adduser {username} {mygroup}

# Change the group ownership to “mygroup”
sudo chgrp -R {mygroup} /usr/anaconda3

# Set read and write permission for root and mygroup only
sudo chmod 770 -R /usr/anaconda3

# Add users to a group
sudo adduser {username}
sudo usermod -aG {mygroup} {username}
# Conda Package 정리
# 다양한 conda 환경을 생성하고 conda package를 설치하고 지우기를 반복하면 {anaconda 설치 위치}/pkgs/ 에 불필요한 패키지 캐시가 쌓이게 되고 용량이 문제가 될 수 있다.
du -h -s --apparent-size /root/anaconda3/pkgs/
# conda 명령어를 통해 cleaning 한다. (이 영역을 임의로 직접 삭제 금지)
conda clean -p
참고)
conda package cleaning 이후에 conda가 정상적으로 동작하지 않는 경우,
아래와 같이 -all 옵션을 추가하여 index cache, lock files, unused cache packages, tarballs 모두 제거 해준다.
conda clean -all
# anaconda 옵션 확인
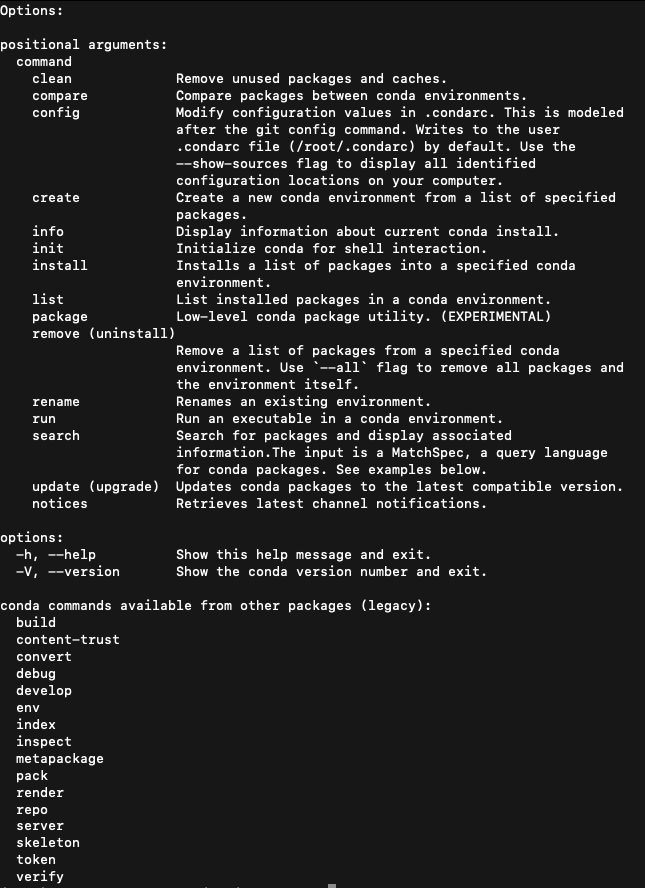
# conda명령을 수행하면 사용가능한 option에 대한 정보를 보여준다.
conda
# 주로 사용하는 아나콘다 명령어는 아래와 같다.
| 현재 생성된 아나콘다 가상환경을 조회한다. | conda env list |
| 가상환경 생성 | const create --name <아나콘다 환경명> python=<파이썬버전 정보> ex) const create --name web python=3.7 // "web"이라는 가상환경이름으로 python 3.7버전 가상환경을 생성하라 |
| 가상환경 삭제 | const remove --name <아나콘다 환경명> ex) conda remove --name web // "web"이라는 가상환경이름의 가상환경을 삭제하라 |
| 현재 생성된 가상환경을 사용한다. | conda activate <아나콘다 환경명> ex) conda activate web // "web"이라는 가상환경을 실행한다. |
| 현재 실행중인 가상환경을 종료한다. | conda deactive |
| 실행중인 가상환경에 파이썬라이브러리 설치 | conda install <라이브러리 이름> ex) conda install django cf) pip install <라이브러리 이름> |
| 가상환경에서 파이썬 라이브러리 삭제 | conda remove --name <아나콘다 환경명> <라이브러리 이름> cf) pip uninstall<라이브러리 이름> |
[가상서버 셋팅]
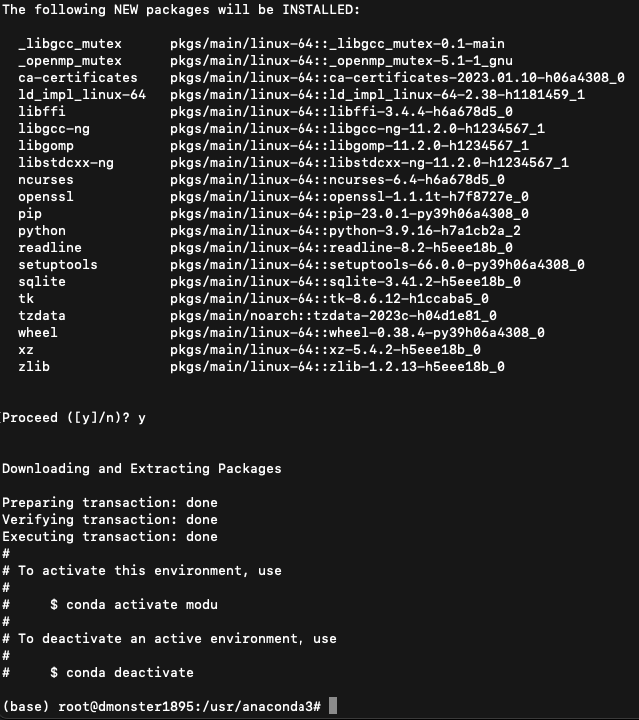
# 파이썬 3.9 버전을 사용하는 서버 환경 셋팅
# 명령어를 입력하면 패키지 설치할거냐고 묻는데 y를 입력하면 된다.
# n 입력 시 생성 중지 후, 종료
conda create --name {프로젝트명} python=3.9
# 서버 환경 활성화
conda activate {프로젝트명}
# Django 설치
conda install django
# Gunicorn
# Django - Nginx로도 웹서버 배포가 가능한데 (=CGI(Common Gateway Interface))
# 파이썬 스크립트가 웹서버와 통신을 하기 위해 Django-Gunicorn-Nginx 이렇게 WSGI(Web Server Gateway Interface)를 사이에 하나 끼워주면 좋다
conda install -c anaconda gunicorn
# 프로젝트 생성 (이름에 _ 가 들어가면 오류 발생)
django-admin startproject {프로젝트명}# 프로젝트 폴더 진입
# 프로젝트 파일들을 받았던 곳에서 프로젝트 폴더 안으로 이동한다.
cd {프로젝트폴더명}# superUser 등록
# admin에 접속 시, 이용할 username과 이메일 주소, 비밀번호를 입력한다.
# 비밀번호가 너무 간단할 경우, 경고 문구가 노출되는데 y를 입력하면 무시하고 생성 가능하다.
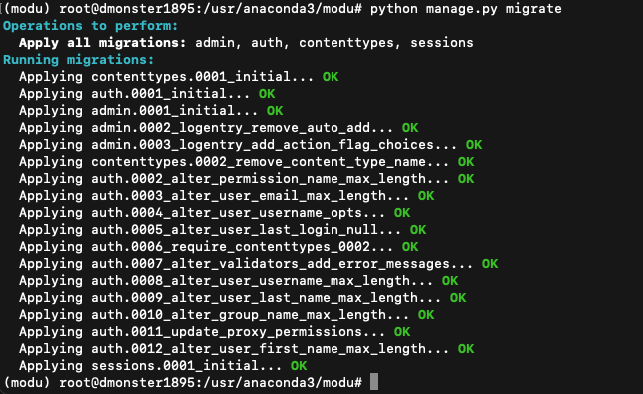
python manage.py migrate
python manage.py createsuperuser
# manage.py 위치에서 동작확인
gunicorn --bind 0.0.0.0:8000 {프로젝트명}.wsgi:application
# gunicorn.service 문서 작성
vi /etc/systemd/system/gunicorn.service

--------------------------------------------

[Unit]
Description=gunicorn daemon
After=network.target

[Service]
User={user name}
Group={group name}
#Group=www-data
WorkingDirectory={manage.py 파일이 있는 곳} ex) /home/dmonster/modu
ExecStart=/root/anaconda3/envs/modu/bin/gunicorn --workers [cpu 1(grep -c processor /proc/cpuinfo) *2 +1] --bind 0.0.0.0:8000 {프로젝트명}.wsgi:application --timeout 600

[Install]
WantedBy=multi-user.target
sudo systemctl start gunicorn
systemctl daemon-reload
sudo systemctl enable gunicorn
sudo systemctl status gunicorn.service
# 자세한 log 보기
sudo journalctl -u gunicorn.service
# 수정할때 멈추기
# enable 에서 symbolic link 생성
sudo systemctl stop gunicorn.service
# 수정 후
sudo systemctl daemon-reload
sudo systemctl restart gunicorn유의사항)
gunicorn이 활성화 되어있는지 확인 후, 다음 진도로 넘어 갈 것!! (나중에 고생 함)
경로와 port 확인할 것!!
# Nginx
# 웹서버역할을 해줄 Nginx 설치
# Gunicorn을 통해 받은 서버를 외부에서 접속할 IP와 포트로 뿌려준다.
# Nginx 설치
sudo apt-get update
sudo apt-get install nginx
# Nginx 설정
sudo vi /etc/nginx/sites-enabled/프로젝트이름
=====
server {
listen 9999;
server_name {IP주소(외부접속)};
charset utf-8;
# favicon
location = /favicon.ico { access_log off; log_not_found off; }
location / {
include proxy_params;
proxy_pass http://{도메인주소}:8000;
proxy_redirect off;
# 아래 코드를 주석처리하거나 삭제해야 urls.py에 선언한 파일 경로가 정상 동작한다.
# try_files $uri $uri/ =404;
}
# static
location /static/ {
alias /home/dmonster/modu/staticfiles/;
}
# media
location /media/ {
alias /home/dmonster/modu/media/;
}
}
=====
# 0.0.0.0:8000 Gunicorn --> IP:9999 배포sudo service nginx restart
sudo service nginx status
# Superviser 설치
sudo apt install supervisor
sudo vi /etc/supervisor/conf.d/{yourproject}.conf
# Superviser 설정
[program:{프로젝트명}]

# 실행할 서비스 스크립트
command={gunicorn 경로} modu.wsgi:application --bind 127.0.0.1:8000

# 루트 디렉토리
directory={프로젝트 폴더 ; /home/dmonster/modu }

# 실행할 유저
user=root

# 자동 시작
autostart=true

# 자동 재시작
autorestart=true

# 스크립트내의 에러 출력 여하
# false로 할시 log에 로그가쌓이지않는다.
redirect_stderr = true

# 로그 저장할 곳
stdout_logfile = /home/{USER NAME}/{project}/{log저장할 파일이름}


# 프로세스를 그룹으로 관리할지 여부. false라면 supervisor를 껐다켰을떄
redirect_stderr=true
# supervisorctl 실행
sudo supervisorctl reread
sudo supervisorctl update


# 시작
sudo supervisorctl start {프로젝트명}
또는
sudo supervisorctl start all

# 정지
sudo supervisorctl stop {프로젝트명}
또는
sudo supervisorctl stop all


sudo supervisorctl status
# settings.py
ALLOWED_HOSTS = [
    '{your_domain}',
]

CSRF_TRUSTED_ORIGINS = ['http://{your_domain}:{port}','https://{your_domain}:{port}']
- 로켓 화면 또는 제작했던 프로젝트 화면이 나오면 완료 -
참고)
[ftp 접속 허용 (vsftpd)]
# 설치
sudo apt-get install vsftpd

# vsftpd.conf 파일 열기
sudo nano /etc/vsftpd.conf
# 추가되는 설정 항목
pasv_address=[서버의 IP주소]
pasv_enable=YES
pasv_min_port=1024
pasv_max_port=1048
# 변경되는 설정
chroot_local_user=YES
anonymous_enable=NOsudo ufw allow 20/tcp
sudo ufw allow 21/tcp
sudo ufw status # Verify the changes# vsftpd 재시작
sudo systemctl restart vsftpd[urls.py에 작성한 경로의 파일들이 모두 404 error 발생할 때]
vi /etc/nginx/sites-available/defaultserver {
# ...
location / {
proxy_pass http://127.0.0.1:8080/;
proxy_redirect off;
}
# ...
}출처 : https://archive.is/DJ9Hr#selection-197.9-197.28
[정적 파일 경로 설정]
# python manage.py collectstatic 후에 새로고침 했으나 static 파일 경로 오류가 나타날 때
# nginx 설정 파일의 내용에 아래 코드 추가
vi /etc/nginx/sites-available/default# ...
location /static/ {
alias {static 폴더 경로}/;
}
location /media/ {
alias {media 폴더 경로}/;
}
# ...# gunicorn socket 이용하기
# gunicorn socket을 이용한다면 아래 코드대로 진행한다.
1. gunicorn.socket 만들기
sudo vi /etc/systemd/system/gunicorn.socket# /etc/systemd/system/gunicorn.socket
[Unit]
Description=gunicorn socket
[Socket]
ListenStream=/run/gunicorn.sock
[Install]
WantedBy=sockets.target2. gunicorn.service 수정하기
#/etc/systemd/system/gunicorn.service
[Unit]
Description=gunicorn daemon
Requires=gunicorn.socket
After=network.target

[Service]
User=mydjango
Group=www-data
WorkingDirectory=/home/mydjango/myprojectdir
ExecStart=/home/mydjango/myprojectdir/venv/bin/gunicorn \
          --access-logfile - \
          --workers 3 \
          --bind unix:/run/gunicorn.sock \
          myproject.wsgi:application
3. gunicorn socket 활성화
sudo systemctl start gunicorn.socket
sudo systemctl enable gunicorn.socket
4. gunicorn 활성화 (수정 후)
sudo systemctl daemon-reload
sudo systemctl restart gunicorn
[ssl 인증서]
# Let's Encrypt 인증서 이용
# 인증 기관으로 등록되지 않은 기관에서 인증한 인증서는 인정되지 않는다.
# certbot을 설치
sudo apt install certbot
sudo apt install python3-certbot-nginx
# Nginx 웹서버에 사용할 Let's Encrypt의 인증서를 발급한다.
# - 발급 진행 시, 이메일 주소와 도메인 주소를 작성한다.
sudo certbot certonly --nginxSaving debug log to /var/log/letsencrypt/letsencrypt.log
Plugins selected: Authenticator nginx, Installer nginx
Enter email address (used for urgent renewal and security notices) (Enter 'c' to
cancel): {your_email_address}
- - - - - - - - - - - - - - - - - - - - - - - - - - - - - - - - - - - - - - - -
Please read the Terms of Service at
https://letsencrypt.org/documents/LE-SA-v1.3-September-21-2022.pdf. You must
agree in order to register with the ACME server at
https://acme-v02.api.letsencrypt.org/directory
- - - - - - - - - - - - - - - - - - - - - - - - - - - - - - - - - - - - - - - -
(A)gree/(C)ancel: a
- - - - - - - - - - - - - - - - - - - - - - - - - - - - - - - - - - - - - - - -
Would you be willing to share your email address with the Electronic Frontier
Foundation, a founding partner of the Let's Encrypt project and the non-profit
organization that develops Certbot? We'd like to send you email about our work
encrypting the web, EFF news, campaigns, and ways to support digital freedom.
- - - - - - - - - - - - - - - - - - - - - - - - - - - - - - - - - - - - - - - -
(Y)es/(N)o: y
No names were found in your configuration files. Please enter in your domain
name(s) (comma and/or space separated) (Enter 'c' to cancel): {your_domain}
Obtaining a new certificate
Performing the following challenges:
http-01 challenge for {your_domain}
Waiting for verification...
Cleaning up challenges
IMPORTANT NOTES:
- Congratulations! Your certificate and chain have been saved at:
/etc/letsencrypt/live/{your_domain}/fullchain.pem
Your key file has been saved at:
/etc/letsencrypt/live/{your_domain}/privkey.pem
Your cert will expire on 2023-08-15. To obtain a new or tweaked
version of this certificate in the future, simply run certbot
again. To non-interactively renew *all* of your certificates, run
"certbot renew"
- Your account credentials have been saved in your Certbot
configuration directory at /etc/letsencrypt. You should make a
secure backup of this folder now. This configuration directory will
also contain certificates and private keys obtained by Certbot so
making regular backups of this folder is ideal.
- If you like Certbot, please consider supporting our work by:
Donating to ISRG / Let's Encrypt: https://letsencrypt.org/donate
Donating to EFF: https://eff.org/donate-le# 발급 완료 시, /etc/letsencrypt/live/ 경로에 아래 처럼 두개의 파일이 저장된다.
/etc/letsencrypt/live/{your_domain}/fullchain.pem
/etc/letsencrypt/live/{your_domain}/privkey.pem
# nginx 설정
# nginx이 sites-available/default 파일을 열고 내용을 수정한다.
vi /etc/nginx/sites-available/default# 추가
server {
listen 80;
server_name {server ip address};
rewrite ^ https://$server_name$request_uri? permanent;
}
# /추가
server {
# 추가
# SSL configuration
listen 443 ssl default_server;
listen [::]:443 ssl default_server;
# ssl file 경로
ssl_certificate /etc/letsencrypt/live/{your_domain}/fullchain.pem;
ssl_certificate_key /etc/letsencrypt/live/{your_domain}/privkey.pem;
ssl_protocols TLSv1 TLSv1.1 TLSv1.2;
ssl_ciphers "ECDHE-RSA-AES256-GCM-SHA384:ECDHE-RSA-AES128-GCM-SHA256:DHE-RSA-AES256-GCM-SHA384:DHE-RSA-AES128-GCM-SHA256:ECDHE-RSA-AES256-SHA384:ECDHE-RSA-AES128-SHA256:ECDHE-RSA-AES256-SHA:ECDHE-RSA-AES128-SHA:DHE-RSA-AES256-SHA256:DHE-RSA-AES128-SHA256:DHE-RSA-AES256-SHA:DHE-RSA-AES128-SHA:ECDHE-RSA-DES-CBC3-SHA:EDH-RSA-DES-CBC3-SHA:AES256-GCM-SHA384:AES128-GCM-SHA256:AES256-SHA256:AES128-SHA256:AES256-SHA:AES128-SHA:DES-CBC3-SHA:HIGH:!aNULL:!eNULL:!EXPORT:!DES:!MD5:!PSK:!RC4";
ssl_prefer_server_ciphers on;
# /추가
root {project 폴더 경로};
# Add index.php to the list if you are using PHP
index index.html index.htm index.nginx-debian.html;
server_name {server ip address};
location = /favicon.ico { access_log off; log_not_found off; }
location / {
include proxy_params;
proxy_pass http://{your_domain}:8000;
proxy_redirect off;
}
location /static/ {
alias {static file 경로};
}
}# nginx 재시작
sudo systemctl restart nginx.service[파일 수정 후 업데이트 방법]
# makemigrations 와 migrate 모두 적용 후
sudo service nginx restart
sudo supervisorctl restart modu
[앱 생성]
# 앱 생성 후 settings.py 의 INSTALLED_APPS 에 앱 이름 등록
python manage.py startapp {App name}[Model]
# models.py 에 작성한 내용의 테이블 등록
# models.py에 DB 관련 내용을 작성했다면 아래의 코드로 등록한다.
python manage.py makemigrations
# 또는
python manage.py makemigrations {App name}
python manage.py migrate
# 또는
python manage.py migrate {App name}# 마이그레이션 없이 테이블 생성
python manage.py migrate --run-syncdb[requirements.txt]
# pip freeze > requirements.txt 입력하면 프로젝트안에 requirements.txt가 생성 되고, 현재까지 설치했던 App들이 작성된다.
pip freeze > requirements.txt# package json 처럼 적용한 모듈 한번에 설치하기
pip install -r requirements.txt'웹 개발 이야기 > django' 카테고리의 다른 글
| [django] 텍스트 자르고 말줄임표 적용(templates) (0) | 2023.05.15 |
|---|---|
| [django] Tag (manytomany) (1) | 2023.05.12 |
| [django] input[type=file] 을 이용하여 첨부한 파일 저장 (0) | 2023.05.11 |
| [django] DB에 담긴 파일 삭제 (0) | 2023.05.11 |
| [django] Google Mail 보내기 (0) | 2023.05.09 |

댓글